This article guides to install Dynamic DNS through Motion Detection from the camera then using the function of sending email notifications to the DDNS server and update the IP address to the hostname DDNS.
You must make sure the selected CCTV camera detects the movement is working normally, if the camera loses signal will not be able to update the new IP address when there is a change.
Steps dynamic DNS installation
Step 1: Turn on Motion Detection alert for the camera.

Set Motion Detection
Step 2: Set Motion Detection warning configuration parameters.
- Channel: select camera channel (Default camera No. 1)
- Enable: Selection (to enable alerts)
- Interval: 120
- Delay: 120
- Selection Send Email
- OK (Save the configuration)
- Click EMAIL
- Enable: Select (to enable Email)
- Äiá»n thông tin hệ thống cung cấp:
- SSL: don't select or select NONE
- Click Mai Testing( View status lines (5): Test message send success) is a successful connection to the server, if it fails, refer to the end-of-article instructions.
- OK (Save the configuration)
- Please check that the information entered into the device is correct?
- Try changing your device's DNS address to 8.8.8.8 and 8.8.4.4.
- Try restarting the device.
- If the above steps still don't work, try to default device again then reinstall DDNS.
- Refer to other ways to install DDNS here

Set Motion Detection warning configuration parameters.
Step 3: Open the Email settings.

Install a warning email
Step 4: Set the email server configuration parameters.


After installing DDNS information on the device, go back to the hostname information management page, wait from 30 seconds to 5 minutes to check if the ip address has been updated or not.
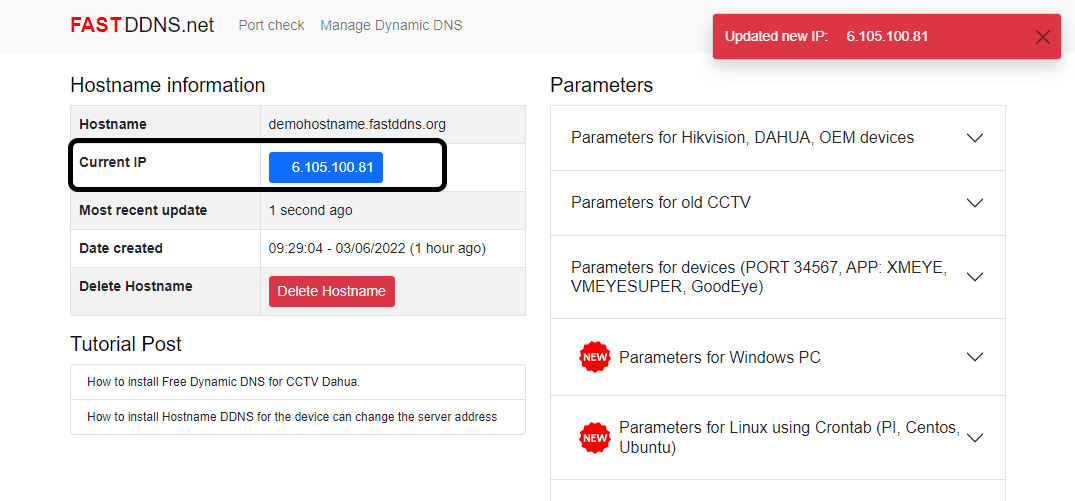
If you still don't see the updated IP address.
Successfully tested on Port (Default) recorder 34567 using GoodEye App, XmEye, vMeyesuper